In this post of our Octopus Deep Dive Series, we’re covering users, teams and user roles. I’ve learned that out of all the topics within Octopus Deploy, user management and permissions can be daunting depending on how customized you want your configuration. It took me some time to figure out how best to leverage security for a large number of teams using one customized security model. With any luck, I can save you some time and give you some new ideas to incorporate into your security model within Octopus Deploy.
Octopus’s user management is quite simple; customization and permissions is tricky. So let’s start with simple – Octopus Deploy supports two authentication modes: Active Directory or local Username/Password. In my experience, I’ve only dealt with Active Directory, but suffice to say, the concept of local is similar to Active Directory only using the local RavenDB as storage for accounts. The big bonus with Active Directory of course is you have Active Directory Groups at your disposal. That said, regardless which mode you choose within Octopus, it’s fairly simple and straightforward. You have users. You have teams which has one or more user roles associated with projects and environments. That’s fairly straightforward.
But what about differentiating levels of access or only allowing a certain Active Directory group or user to deploy to a specific environment? What about controlling access to viewing or editing variables for a select group of users? Luckily, Octopus can do it all and there are tools within the UI to help you out. Keep in mind that a lot of experimentation may be required on your part to get what you want but know that nearly any configuration you can concoct, Octopus can implement.

For more complex configurations, it’s not as intuitive as user management. In Octopus, customizing user/group access is cumbersome, but achievable. Understanding that teams can represent users, active directory groups, any number of projects, environments and (user) roles both built-in or your custom roles, you’re effectively juggling five major components as a single unit. And while the team concept may seem relatively intuitive, the ability to create roles (aka permissions) to apply at a broad or granular level requires planning.
Note, there are two (system) teams that are built-in. The Octopus Administrators and Everyone teams. The Octopus Administrators team is fairly obvious. For those who want to be able to administer the Octopus server, enter the user or Active Directory group into this team. Octopus Administrators have the “System Administrator” role applied to the team. The Everyone team automatically hosts all users that have logged into the system. There’s really no immediate use for it unless you want to apply global rights or restrictions to everyone equally.
A quick overview of creating a team as shown in Figure 1, within the Create team page, you need a unique name to identify the team. The roles are referring to (user) roles, not machine or server roles as I’ve covered in the past. Projects and environments are implicitly inclusive so if you don’t specify any project or environment, the team will have access to all projects and environments on the Octopus server. Members on this page are referring to user accounts for the local database as this is showing a non-Active Directory setup.

For Active Directory setups, you’ll see the Add Active Directory group option available (see Figure 2). So whether you’re using the local user/group database or Active Directory, users and/or Active Directory groups are the target for whom the teams permissions are applied to; the projects and environments are the scope for which the permissions the role is applied. So far, so good. Next, User Roles.

By default, Octopus has a number of built-in user roles. Each role has a specific combination of permissions set. You can see in Figure 3 within the description for each built-in user role, the description of the permissions that the user role has.
Octopus allows you to create your own roles which is critical for customizing permissions. You can easily create a user role and assign it to a team. User roles are basically all the permissions permissions for projects, environments, users and Active Directory groups in the scope you’ve applied within your team. Permissions cover a lot of areas within Octopus. It’s too lengthy to mention all the options so we’ll use a hypothetical scenario to demonstrate an approach to permissions. Over the past few months, I’ve found out that when it comes to defining complex permissions in Octopus, you have to take a layered approach.
Layering allows you to customize permissions however you need to; it’s implementation seems little crude, it requires a lot of experimentation and refining but it does work. Let’s take a hypothetical scenario of a web application, SampleApp.Web. We have four environments defined in Octopus: Development, Testing, Staging and Production. We want our developers to be able to create releases and deploy them in the development environment and promote to testing for the testers once they’ve deemed a release to be tested. We want the testing team to create and promote releases from testing to staging once they’re done, but we don’t want them to change the deployment process or deploy to production. We also want the lead developers to promote releases between testing, staging and production. Lastly, we want all these teams to be able to view all releases in other environments, but not necessarily create or deploy releases to any of them.
I’ve found that in Octopus, it’s best to primarily layer by role (permissions) and by environment. There may be edge or corner cases I haven’t considered, but when you look at the permissions you want to exercise and where you want them applied, things become a lot clearer. Looking at the Development team in our example, giving them rights as a project and environment viewer for the Development and Testing environments ONLY grants those abilities in said environments. If you want developers to see what’s going on in staging or production, you need another team to apply those roles across all the environments you want.

Let’s start with the SampleApp.Web at the top. This is the project. This project will be defined for our four teams. Why four teams? In order to get the desired permissions we want, each team will have to have a mapping to developers, testers and lead developer/product owner. There’s some overlap in what we want to enable each team to do, the environments is what separates them so we need to create individual teams for each specific user type in our example. Additionally, we need another team to enable all the users/groups within the other teams to view all the environments and project details, hence a forth team.
Starting with the Development team, we’ll assign it to the Development and Testing environment. Beyond that, there’s no need for them to deploy to staging or production. The Project Lead and Project Deployer roles will work just fine as it allows developer to edit the deployment process, create/edit variables and create/deploy releases to the two environments they’ve been assigned to.
The Testing team, we have to give a custom user role as there’s no exact built-in user role we can use (or any combination of roles) for our needs. We want the testing team to be able to create and release deployments from the Testing environment to Staging, but we don’t want to give any ability to alter the deployment process or change any variables for the specific environments. This requires a new role which we’ll create shortly.
The Team Leads can deploy to any non-development environment. This might not be ideal but for our demonstration purposes, it’s adequate. They can modify variables or the deployment process as well, but their access is between testing and up to production. This is just a hypothetical example of course but ideally, I imagine most leads would need access from development to staging where as production is a limited number of exclusive users. For our example, this is fine for now.
The last team we’ll create is to allow *all* teams to view the deployments in other environments they don’t have direct rights to. This team, which we’ll call “environment viewers”, is to address that the way other teams are assigned to environments limits visibility of deployments in other environments. This is why you need to layer permissions; when applying a specific role (permission) to a team, the scope (projects and environments) affects everything. That said, you can achieve what you want, but again – it will require experimentation. Let’s call this custom user role “Tester deployer”.
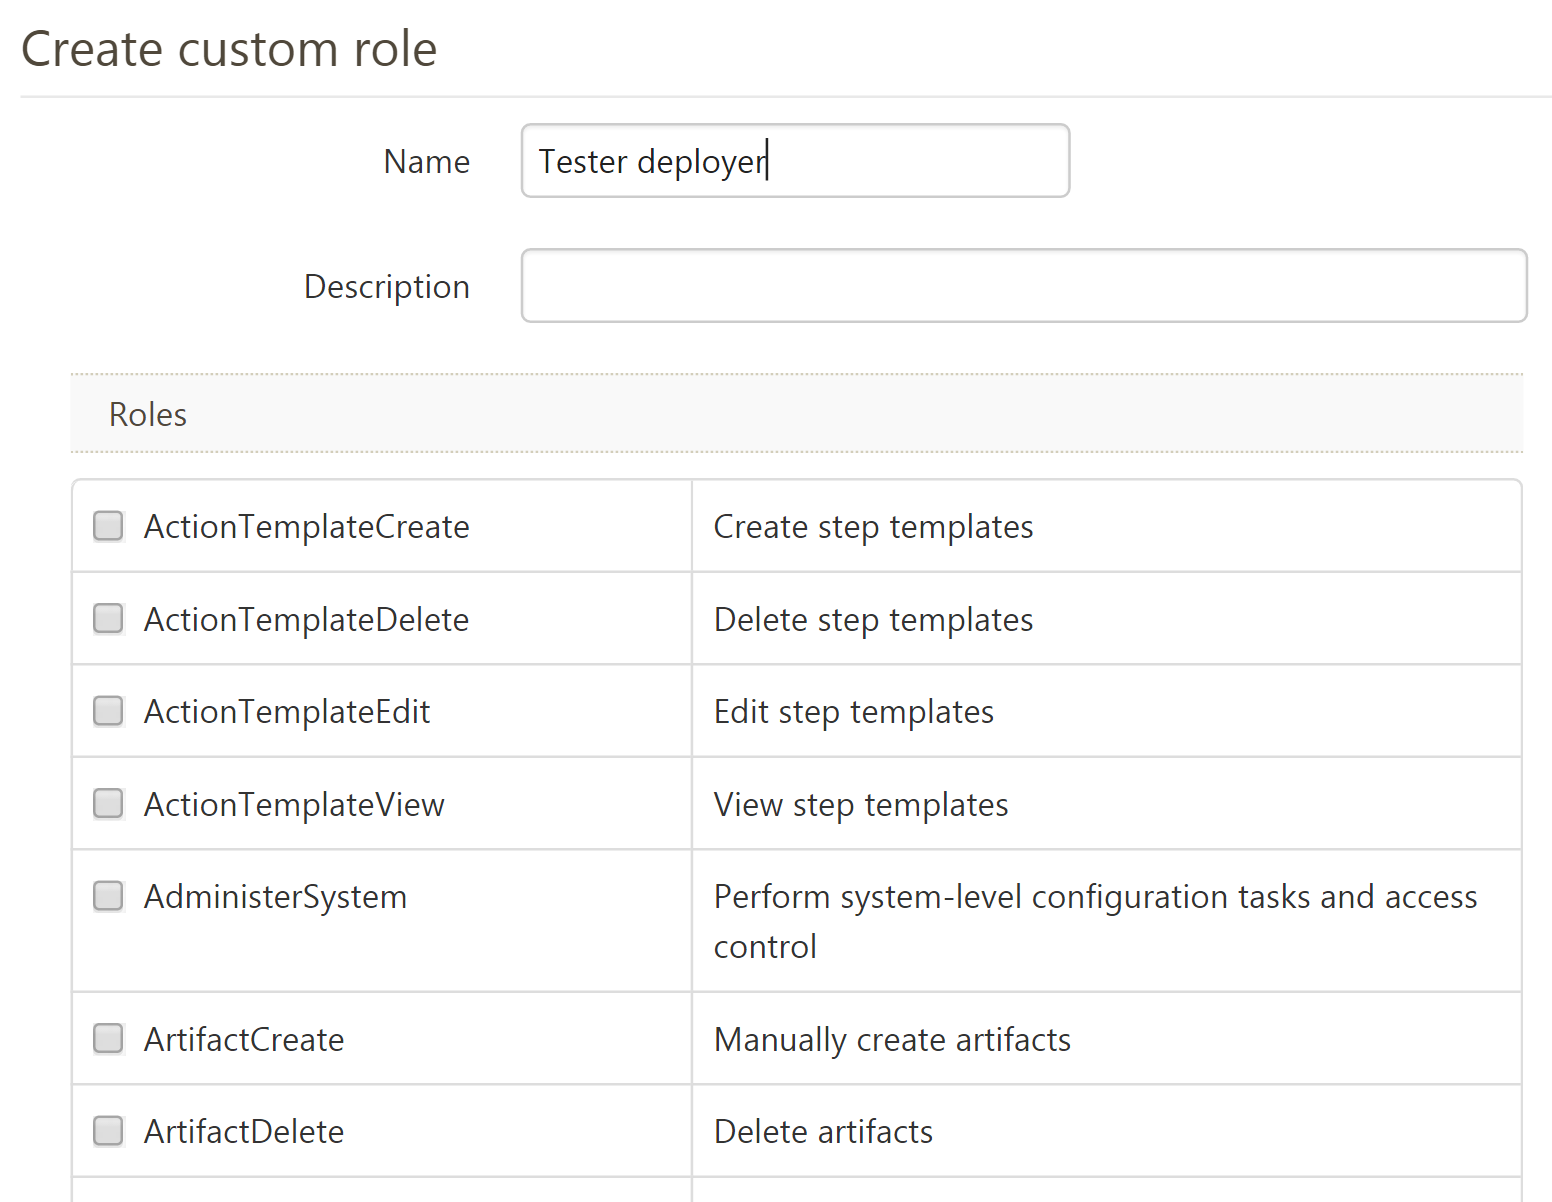
To create a custom role, click on the configuration tab. Go to “Teams”. In the upper right-hand corner, click on “Roles”. Then click on the “Add custom role” button in the upper right hand corner and you should see the Create custom role page as shown in Figure 5.
Like anything in Octopus, you need to make a unique name for the role. Within the custom role page, you see all the roles listed and what actions they allow. By checking the checkbox, you enable those abilities for that role. I did a quick guestimate to see how many roles there were and I believe it’s around 60. So, there’s 60 roles you can enable/disable for any given team you want to assign permissions for. The wide variety of roles enables you to specifically target certain features within Octopus teams. So what roles or permissions would I select for our Tester deployer role? Figure 6 shows a portion of roles or permissions I’ve chosen what I want to allow or disallow.
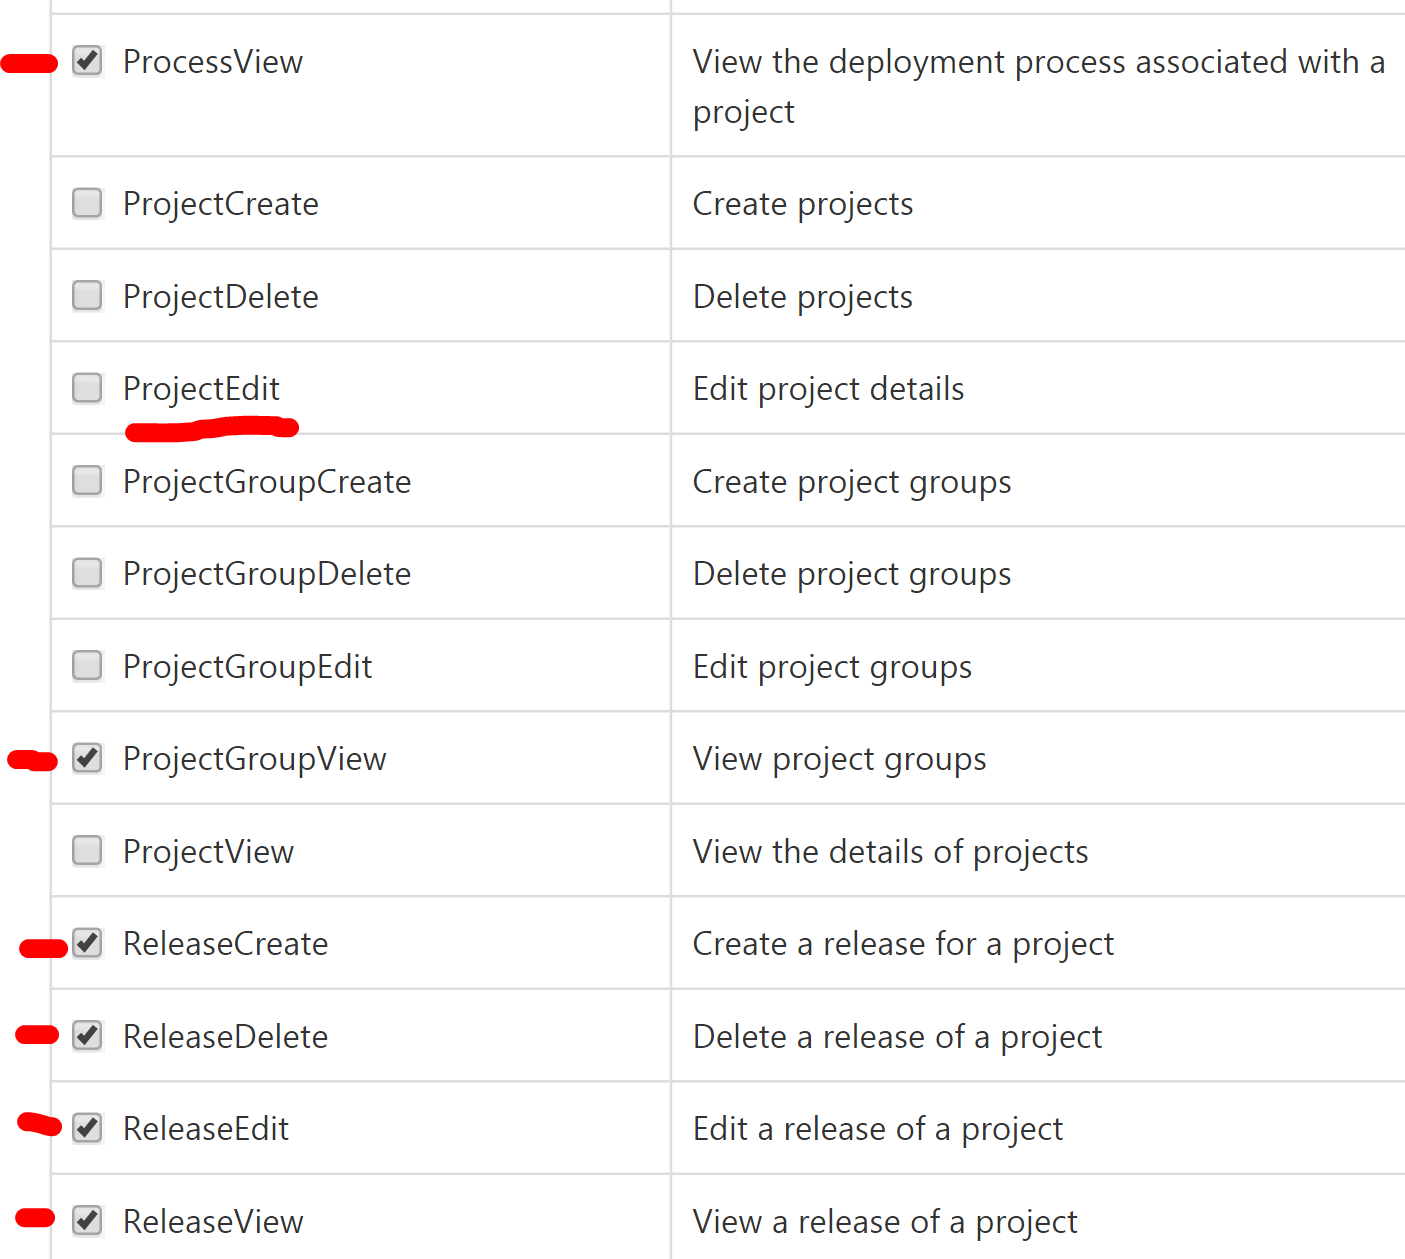
So I’ve selected ReleaseCreate, ReleaseDelete, ReleaseEdit and ReleaseView as I want the testers to be able to deploy from the test environment to staging. Note how I did not select ProjectEdit. I don’t want testers to be able to modify anything. There are many roles that span different aspects of Octopus’s security levels. I didn’t show them all here, but I showed this to illustrate how customizing your roles is as easy as checking on or off checkboxes within the custom roles page. With this, you can concoct any combination of permissions into a unique role and apply it to your teams. I’ve repeated myself quite a few times but the best way to get the results you want is to experiment. Once you get accustomed to the rights and what it’s capable of, you’ll see that anything is possible – it just requires planning. If you’re not sure what permissions are being applied, on the “Teams” page in the upper right hand corner, you’ll see a “Test Permissions” link. That link will take you to a page as shown in Figure 7 where you can inspect all the permissions that are being applied to a user regardless of project or environment. It’s an invaluable tool to see what rights people have and while you’re tinkering with your configuration.
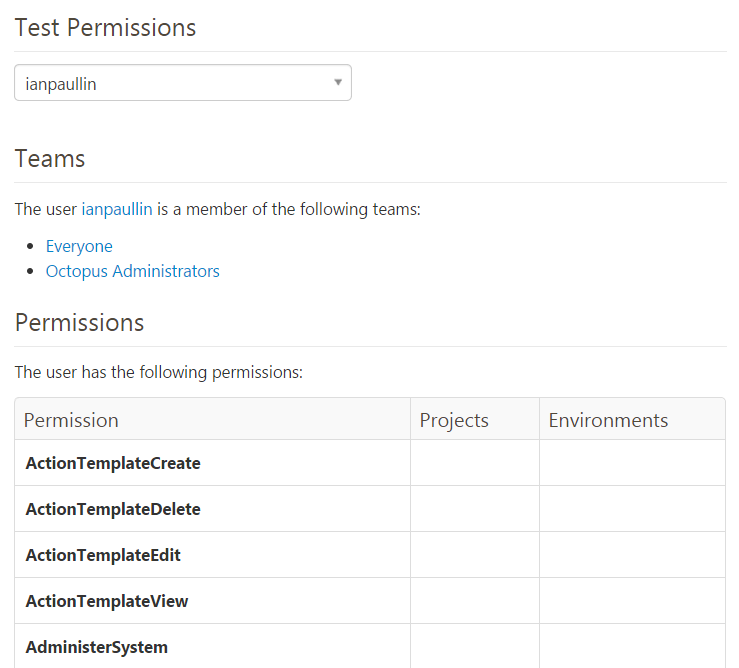
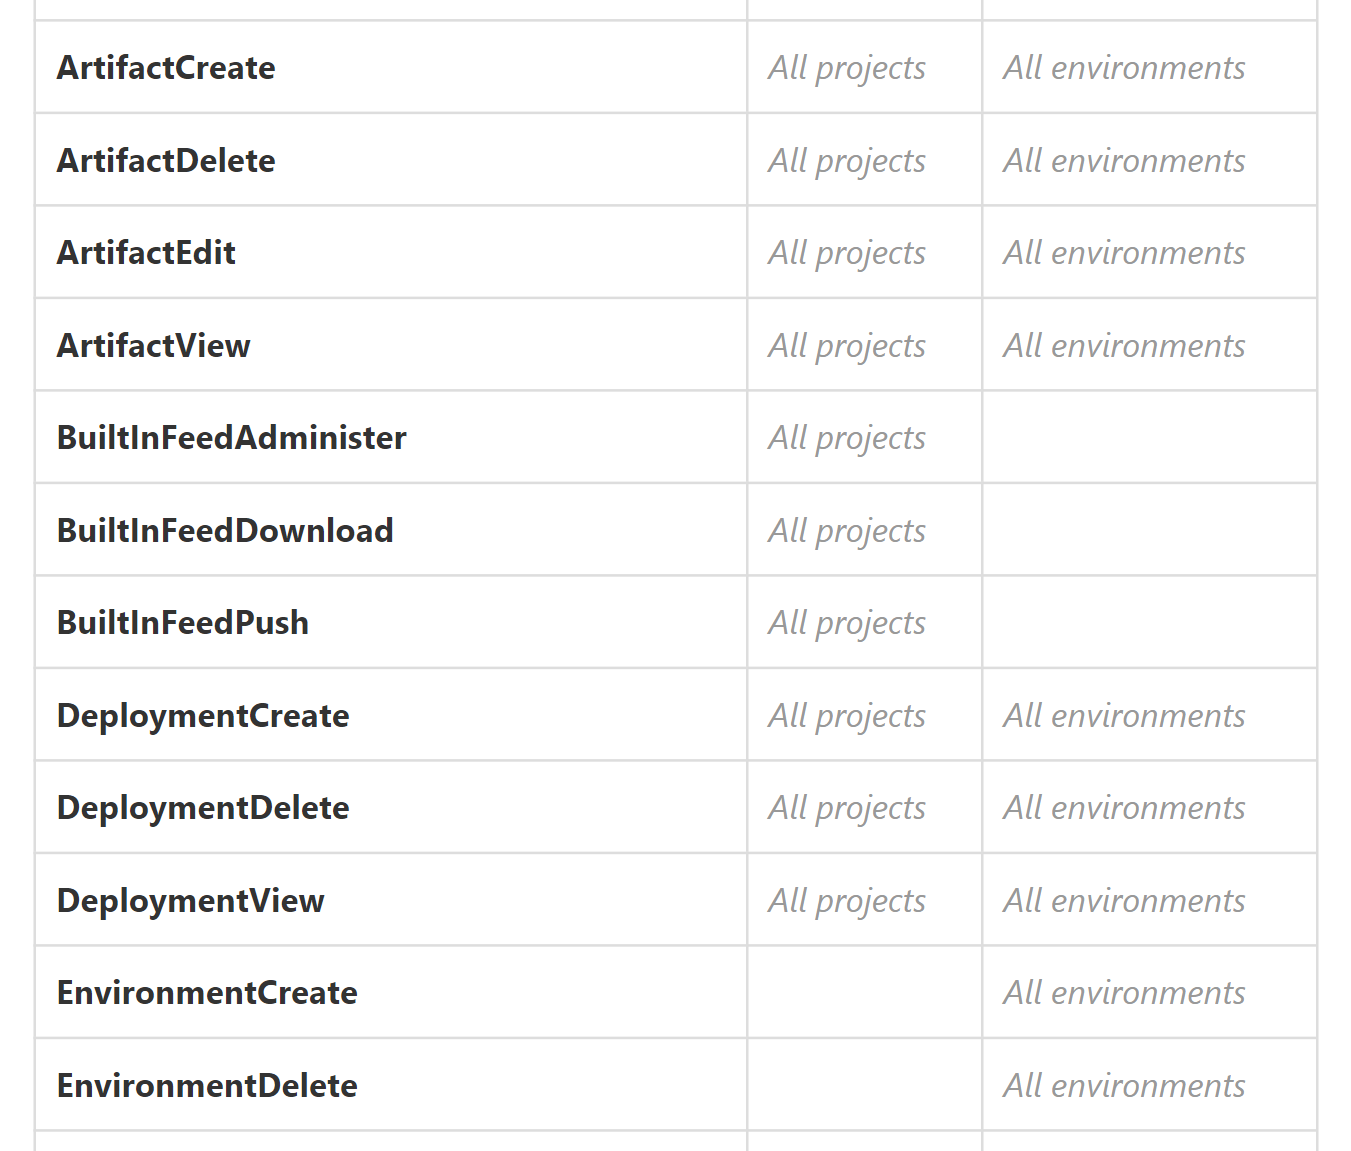
Here you can see my access in my octopus server that’s on Azure. This test permissions tool is used to see what projects and environments have access to which permissions for a particular user as entered up above. It’s invaluable tool while testing and finding permission mistakes for specific users. Since I’m an Octopus Administrator, you can see some of my permissions in Figure 8 below.
Our Octopus server (as of this writing) has over 70 project groups, over 100 projects, nearly 300 users and closing in on 400 teams. Yes, you read that correctly. 400 teams. Our current security model (in reference to the teams and relationships of all the roles/environments and projects) is complex and cumbersome to manage manually with 6 to 7 teams to represent one project. I say 6 to 7 because project teams have an option of having additional users as approvers (that are not developers) to their production environment but it’s by request only. Our security model is standardized and automated across all teams and it works beautifully.
We leverage Active Directory Groups used within TFS so user management for us is non-existent. If a team wants another user to have access within Octopus, all they need to do is add them into their own TFS Active Directory group and they automatically have login access to Octopus with all the necessary permissions ready to go. It took quite some time to hammer out a scheme where we tie TFS Active Directory groups to our teams within Octopus, but we’ve automated the provisioning process (I’ll follow up with this in another deep dive) and all teams are built using the same process and security model leading to very predictable and reliable permissions.
Today, we spend little to practically no time dealing with user management and permissions. It’s seldom an issue and Octopus’s architecture needs to get some credit. We’ve had to revise our model a few times as there were permissions we didn’t consider but at least we were able to adjust and automate after the fact. I’m not sure another product would have allowed us to create this security model inline with our business and auditing processes. Obviously, we heavily leverage the REST API within Octopus for all our automation and I think the API is a huge asset that sets Octopus apart. It makes automation and customization possible for any of your needs.
I hope this example gives you some ideas on how to customize users and team permissions within Octopus Deploy. Granted that our example is purely hypothetical, it’s important to realize that users, groups and permissions, while a simple subject, can be difficult to customize if you’re not aware of how all the components work together. Once you try it out, you’ll see it’s a matter of experimentation and patience. You can control users and teams as broad fashion or in a granular one if you so choose. In large scale environments with lots of projects, users and teams, you must have a strategy for managing permissions consistently. It’s challenging but once you figure out your security model with user roles, you’ll be able to deliver a consistent security experience for teams. For smaller organizations or teams with limited number of users or projects, this level of customization might not be necessary. But it’s nice to know that regardless of the size of your Octopus user base or the number of projects that you’re deploying, you can customize Octopus security in any way imaginable.
That’ll do it for this deep dive post on user security. Next article I haven’t quite decided on yet.